With Just Cause 3 finally on store shelves, more than five years after its predecessor’s arrival, gamers are relishing the opportunity to explore the tropical paradise first unveiled last year. While the game’s launch hasn’t exactly been the smoothest, thanks to graphics bugs on PC and performance issues on consoles, that hasn’t stopped thousands of gamers from diving into Avalanche Studio’s latest open-world action game. But not everyone playing Just Cause 3 this week is a longtime fan of the series.
Thousands of gamers are experiencing the Just Cause franchise for the first time. And some of the action in Just Cause 3 might be a bit intimidating to those lacking prior experience. So we’ve come up with a few pointers for those getting their first dose of Rico Rodriguez in Just Cause 3. Some of these tips might prove useful to more-experience players, who spent time with Just Cause and/or Just Cause 2, but they’re primarily aimed at those coming to the series for the first time.
As always, we’re happy to field input from fellow Just Cause 3 players. If you’ve got a tip for Just Cause newcomers, feel free to leave it in the comments section. But here are the eleven strategies that helped us during our first dozen or so hours with Just Cause 3.
Just Cause 3 Tip #1 - Target SAM Sites First
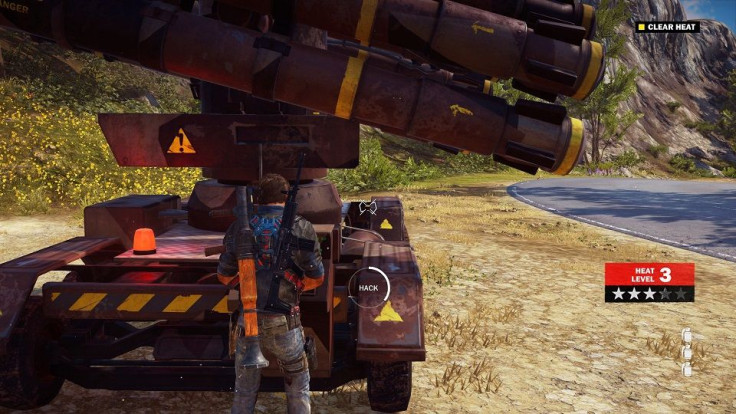
This one is pretty self-explanatory. Anytime you’re heading into a new settlement, take a minute to disable any nearby SAM sites that might prove troublesome if/when you decide to steal an enemy jet or helicopter. Even if you decide not to take to the skies, having a little air support can be vital when your Heat level begins to climb. Taking down some settlements is hard enough, thanks to the sheer number of soldiers sent to kill Rico, without constantly having to dodge missile barrages and bombing runs.
Just Cause 3 Tip #2 - Use The Tether To Avoid Building Heat
Things can spiral out of control pretty quickly in Just Cause 3 when liberating settlements, thanks to soldiers’ newfound ability to call in reinforcements. While that won’t bother longtime players, who are accustomed to hopping around the battlefield, mopping up soldiers while destroying whatever Chaos objects they can find, it might prove to be a bit troublesome for those new to the Just Cause franchise. Fortunately, it’s possible to do some of that dirty work without landing on the government’s radar.
Rather than using rockets, grenades and other firearms to take out the various Chaos objects in each settlement, spend the first few minutes of your assault using your tether to rip down Chaos objects out of sight of Di Ravello’s thugs. In larger cities, there’s still a good chance you’re going to be spotted before clearing out the entire base. But it’s pretty easy to liberate smaller settlements before the soldiers assigned to guard them ever realize what’s happening.
Just Cause 3 Tip #3 - Tether From The Top
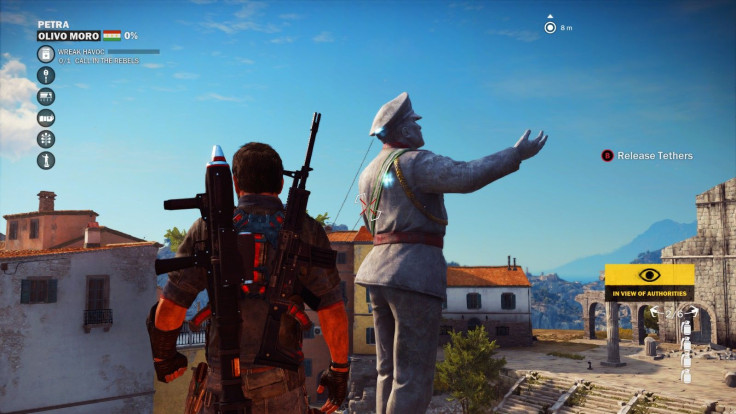
We’ve already talked about why you’d want to tether Chaos objects, instead of taking them down with explosives and firearms, but not everyone is going to have much luck with that early in their Just Cause career. For starters, a variety of unearned Gear Mods leave your tethers relatively lackluster early in the game’s campaign. But there’s also the fact that you’re trying to destroy very large, frequently metallic, objects with a set of tethers that can pull two objects closer together. As your tethers get stronger, this becomes less of an issue. But the best way to overcome your tether’s early shortcomings is by using physics to your advantage. Meaning, place your tethers as high up on a Chaos objects as possible.
When dealing with statues, run a tether from ground level to the head and/or shoulders to bring the fixture down. When it comes to fuel tanks, tether near the top (vertical) or at the end where pipes are attached (horizontal). The same goes for speakers, satellite dishes and the various radar installations. Attach your tether as far up the device as possible and then use immovable objects, like buildings or the nearby ground, as your anchor.
Just Cause 3 Tip #4 - Explosives And Enemy Kills Build Havoc
Police stations may be listed as a Chaos object in Just Cause 3 but the heavily-fortified compounds found in Medici’s biggest cities can sometimes feel like their own mini-settlement in need of liberation. The fact that a separate meter, gauging Havoc, must be filled to put the station in rebel hands only adds to that feeling. But it can also make the process a bit confusing, particularly when you inevitably encounter a station with few Chaos objects to put a dent in that Havoc meter. Just remember that pretty much any act of destruction, from shooting standard exploding barrels to killing enemies, will gradually keep that meter rising. Blowing up military vehicles helps, too.
Just Cause 3 Tip #5 - Destroy Speakers Before Monitors
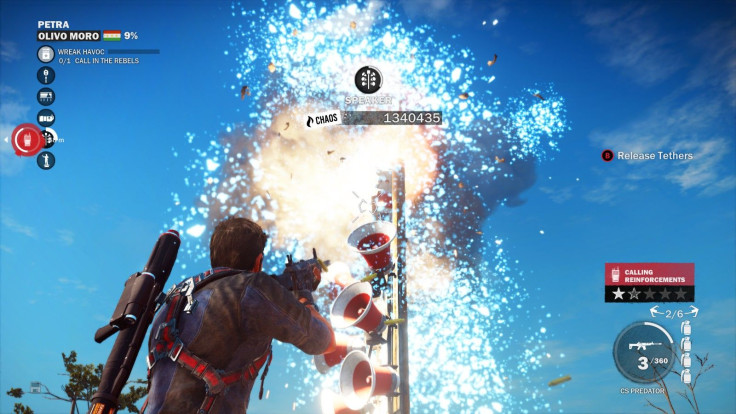
Monitors might be the easiest set of Chaos objects to dispatch, given the presence of objective markers and the fact that they must be cleared when Rico doesn’t have any Heat, but that doesn’t mean some fans won’t still encounter a few issues during a process. To save yourself some headaches, and make it even easier to spot the monitors spread throughout each base, take the time to destroy any/every local speaker system before turning your attention to the monitors. Both have red lights fixed to the top, making them easy to spot from far away. But, if the speakers have all been destroyed already, you can follow those red lights from one monitor to the next.
Just Cause 3 Tip #6 - Steal Nearby Cars When You Find New Garages
Rebel Drops are made available to Rico pretty early in the Just Cause 3 campaign. But it’s the player’s responsibility to recover whatever vehicle(s) he/she wants to use to get around Medici. Obviously, that can be a bit of an inconvenience, but we’ve come up with a rather simple solution. As some of you may have already noticed, a handful of drivable vehicles are usually within eye sight of Mario’s garages. Any time you find yourself in the neighborhood, take a quick minute to steal whatever nearby vehicle(s) aren’t already in your collection. Sports cars, in particular, will come in handy when it comes time to track down the various Daredevil Jumps spread across Medici.
Just Cause 3 Tip #7 - Unlock Precision Aim ASAP
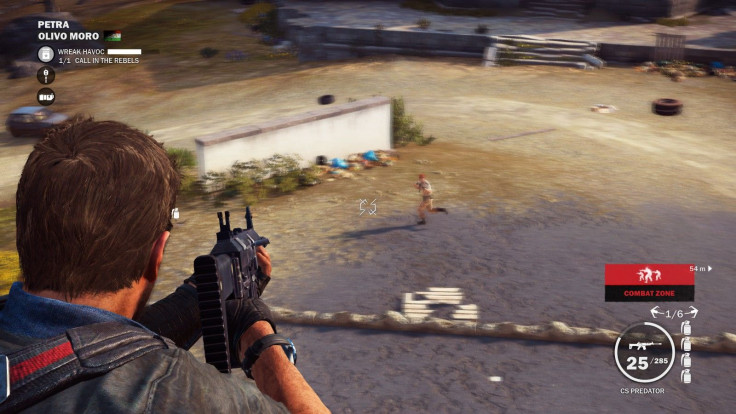
I’d been playing Just Cause 3 for close to 30 hours before realizing Precision Aim was something that could be unlocked in Gear Mods. Turns out, most of the game can be completed without ever having much control over where Rico is firing. But I wouldn’t recommend it. Once you’ve finished the game’s tutorial missions, and are given the freedom to roam Medici, keep an eye out for weapon Training Courses. As soon as one appears on your map, make a beeline for it and earn enough gears to unlock the Precision Aim ability for Rico. Now enjoy your newfound ability to accurately fire at distant targets.
Just Cause 3 Tip #8 - Tether Vehicles To Buildings/Roads To Conserve Ammo
This is another one that won’t be much of a shock to longtime Just Cause fans. But those new to the series may not realize just how effective the tether can be, when dealing with enemy armor; particularly after you upgrade the strength of your tethers. Next time you’re dealing with a couple of pesky helicopters, try tethering them together and forcing a mid-air collision instead of firing off half your RPG ammo. Tethers are also extremely useful when dealing with military vehicles during the various chase sequences in the Just Cause 3 campaign. So, if you find yourself struggling with a particular mission because of a lack of ammunition, see if a few extra tethers doesn’t solve the problem.
Just Cause 3 Tip #9 - Visit Rebel Shrines For Free Fast Travel
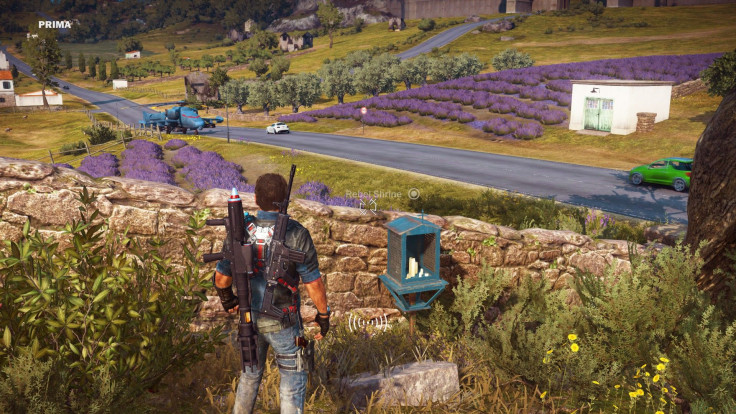
Rebel Shrines are one of five sets of collectibles featured in Just Cause 3. At first glance, they might not seem like much more than an attempt to lengthen the total play time required to 100 percent the game. But hunting down each Rebel Shrine can actually be extremely beneficial to Just Cause 3 players. Once you’ve located all of the Rebel Shrines in a given region (Dragon, Fonte or Striate), Rico will be able to fast travel to any settlement or challenge in the area without having to use a flare. So, if you find yourself losing patience with the flare system half as frequently as a I did, use our list of Rebel Shrine locations to earn yourself some cost-free fast travel in the region(s) of your choice.
Just Cause 3 Tip #10 - Fire Leech Is OP
As soon as you find the Fire Leech, grab hold and never let go. In my case, I happened to encounter a rocket-firing elite soldier a dozen or so hours into my time with Just Cause 3. The Gjallarhorn-esque rocket launcher is typically unlocked much later in the game but, having recognized it from pre-launch coverage of the game, I immediately seized the Fire Leech from my fallen foe and turned it against the very army who’d just been pointing it at me. Given the device’s homing capabilities, it probably won’t come as a shock that I refused to drop it until it was added to my Rebel Drop list, which didn’t come until very near the end of the campaign. At times, that meant lugging around a launcher I had no ammo for. But holy crap was it worth it. There’s pretty much nothing in Just Cause 3 that can stand up to the Fire Leech. At most, it might take two shots instead of one to destroy heavily-armored vehicles or Chaos Objects. Even the game’s final boss didn’t take more than a couple of shots to destroy.
Now go find yourself a Fire Leech and let mayhem rain down from the skies.
Just Cause 3 Tip #11 - Use The Map To Locate Chaos Objects
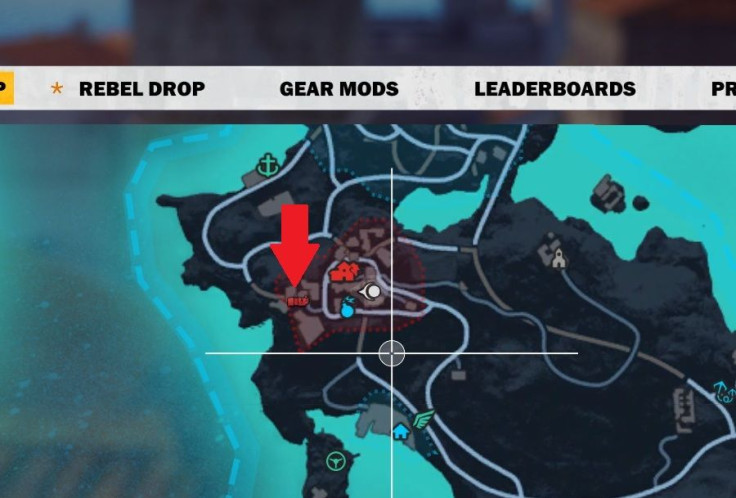
Recognizing that the aimless hunt for undiscovered Chaos objects was heavily padding the amount of time it took players to liberate settlements in Just Cause 2, this year’s entry in the series makes it a bit easier to track down hard-to-find Chaos objects. The game accomplishes this by adding icons to your map, which become more-visible as you get closer to 100 percent liberation of the site, which make it considerably easier to find hidden Chaos objects in Just Cause 3. There are still going to be a few times when you’re not sure where to go, thanks to the decision to hide some Chaos objects underground and/or other multi-tiered environments, but it’s still a noticeable improvement from JC2.
***
Be sure to check back with iDigitalTimes.com and follow Scott on Twitter for more Just Cause 3 coverage throughout the rest of 2015 and for however long Avalanche Studios continues to support Just Cause 3 in the months following launch.


